
If your condo bathroom feels outdated, cramped, or just plain uninspiring, it might be time for a glow-up. A well-designed bathroom remodel can transform your everyday routine, boost your condo’s resale value, and make even the smallest space feel like a luxurious spa.
But unlike house renovations, remodeling a condo bathroom means working around space limits, building rules, and sometimes shared utilities. This guide will help you tackle all of that with confidence. Get ready for clever design strategies, practical tips, and space-saving solutions to help you create a stylish, functional condo bathroom.
Why Remodel Your Condo Bathroom?
Let’s be honest—condo bathrooms often get the short end of the design stick. They’re small, generic, and usually outdated. Here’s why a remodel condo bathroom is a smart move:
-
Value Boost: A modern, well-designed bathroom is a major selling point.
-
Better Use of Space: Custom layouts can make a small space feel much larger.
-
Energy Efficiency: Upgraded fixtures and lighting can cut your utility bills.
-
Daily Luxury: Who doesn’t want to start their day in a beautiful, relaxing space?
Step 1: Know Your Boundaries (Literally)
Before you start dreaming up Pinterest-worthy tile patterns, check your condo association’s renovation rules. Most buildings have strict guidelines about:
-
Working hours
-
Approved materials and noise levels
-
Plumbing and electrical changes
-
Contractor insurance requirements
-
Elevator and hallway usage
Get written approval and necessary permits early—this avoids project delays or costly do-overs.
Step 2: Map Out Your Budget
Your budget will shape every decision. Condo bathroom remodels usually range from $8,000 to $25,000, depending on finishes and layout changes. Here’s a typical cost breakdown:
| Category | Approximate Cost |
|---|---|
| Demolition & prep | $500 – $1,200 |
| Plumbing & electrical | $2,000 – $5,000 |
| Fixtures & fittings | $1,500 – $4,000 |
| Tile & flooring | $1,500 – $3,000 |
| Vanity & countertops | $1,000 – $3,500 |
| Labor | 40% – 60% of total |
Pro Tip: Set aside at least 10-15% extra for surprises. Condo walls and plumbing can hold hidden issues you won’t see until demolition begins.
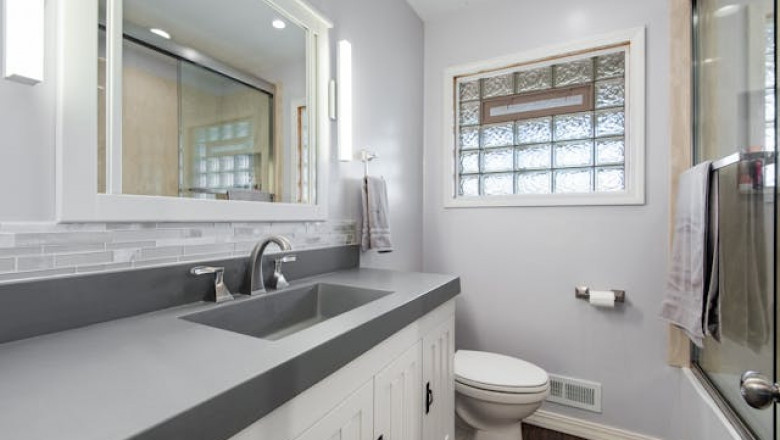
Step 3: Design Smart for Small Spaces
Space is tight in condo bathrooms—but that’s no excuse for boring design. Use these strategies to maximize style and function:
1. Wall-Hung Fixtures
Install a floating vanity and wall-mounted toilet to create the illusion of more floor space and make cleaning easier.
2. Walk-In Shower with Glass Enclosure
Ditch the bulky tub. A frameless glass shower keeps things sleek and open. Bonus: it makes your bathroom look twice as big.
3. Vertical Storage
Think tall, not wide. Add open shelves, recessed niches, or medicine cabinets to use your wall space wisely.
4. Pocket or Barn Doors
Traditional swing doors eat up precious space. A pocket door or sliding barn door gives you more room to move.
5. Bright, Light, Reflective Surfaces
Use glossy tiles, large mirrors, and light tones (like white, soft grey, or beige) to bounce light around and open up the room visually.
Step 4: Choose Low-Maintenance, High-Impact Materials
Your condo bathroom might not get as much ventilation as a single-family home, so choose materials that resist moisture and mildew:
-
Porcelain Tile: Durable, stylish, and water-resistant.
-
Quartz Counters: Sleek, stain-resistant, and no sealing required.
-
Luxury Vinyl Plank (LVP): Affordable, waterproof, and looks like wood or tile.
-
Matte Black or Brushed Brass Fixtures: Trendy and fingerprint-resistant.
Stay away from porous materials like natural marble unless you’re committed to regular sealing and maintenance.
Step 5: Add Modern Touches
Give your condo bathroom a spa-like upgrade with these trending features:
-
Heated Floors: A luxury that’s surprisingly affordable in small bathrooms.
-
Backlit Mirrors: Doubles as task lighting and a stylish statement piece.
-
Rain Showers & Handheld Sprays: Combine both for luxury and function.
-
Bluetooth Speakers or Smart Mirrors: Because singing in the shower is better with bass.
Step 6: Hire the Right Contractor
This step is critical—condo remodeling isn’t for beginners. You need a contractor who:
-
Has experience with condo projects
-
Knows how to work with HOAs and permits
-
Understands condo plumbing/electrical systems
-
Can minimize disruption to neighbors
Always check references, ask for a detailed estimate, and confirm they carry the right insurance.
Step 7: Prepare for Renovation Life
Remodeling a condo bathroom can be disruptive. Here’s how to survive the process:
-
Plan bathroom access: If it’s your only bathroom, you may need to stay elsewhere temporarily.
-
Protect common areas: Use floor covers in hallways and elevators.
-
Keep neighbors in the loop: A little courtesy goes a long way in shared buildings.
Final Design Tips for a Dreamy Condo Bathroom
-
Accent Wall: Add a pop of color or pattern with a bold tile wall.
-
Matching Hardware: Keep your faucet, drawer pulls, and towel bars in the same finish for a cohesive look.
-
Hidden Lighting: LED strips under the vanity or behind a mirror add modern flair.
-
Greenery: Add a small plant like a fern or peace lily for a fresh, spa-like vibe.
Wrap-Up: Small Space, Big Impact
Remodeling your condo bathroom is your chance to take a small, overlooked space and turn it into something exceptional. With smart planning, the right materials, and a great contractor, even the tiniest bathroom can become your favorite room in the condo.
Remember, a great bathroom glow-up isn’t just about aesthetics—it’s about comfort, efficiency, and everyday luxury.
Ready to give your condo bathroom a glow-up?
Start planning today with a mood board, contractor interviews, and a realistic budget. Big transformations can happen in small spaces—especially when you design with purpose.


Comments
0 comment